Table of Contents
- Introduction
- Assemble the Parts
- Configure the Radio
- Wire up the Circuit
- Use it!
1) Introduction
Words are how humans communicate. An inexpensive LCD text display can be the most economical way to make your project talk to people, and it's easy to make a wireless one with a Digi XBee radio. Digi XBee radios in transparent mode generate plain text right out of their serial port. By pairing the Digi XBee with an LCD that has a serial backpack, any text you send to your Digi XBee will show up directly on the electronic screen. You can use control codes to clear the display, move the cursor or smoothly scroll the text in either direction. Build this example for inexpensive wireless text output. It's the fastest way for your project to gain human communications!
2) Assemble the Parts
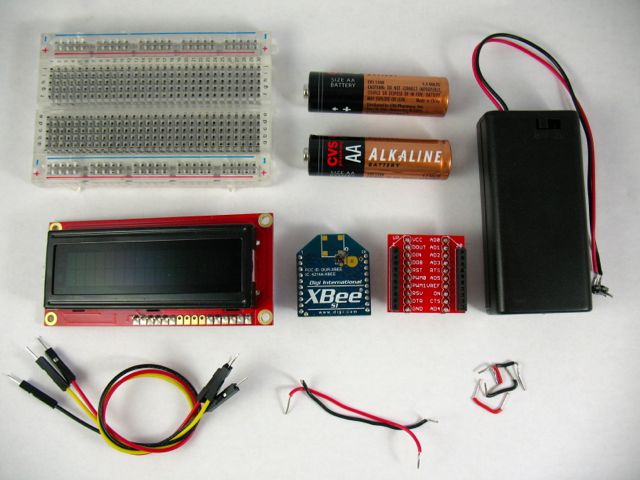
To hook up an LCD to a Digi XBee for text output, you'll need:
4) Wire up the Circuit
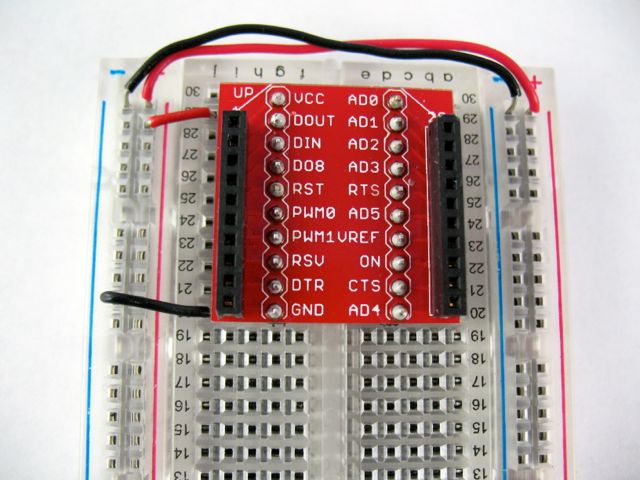
- Place the XBee adapter into the breadboard and wire up the power buses to each other. Next, connect the VCC terminal of the XBee adapter to the positive rail and the ground terminal to the negative rail.
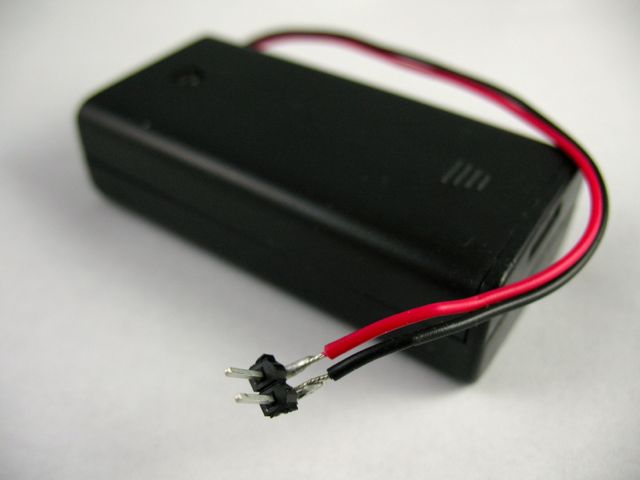
- We made it easier to attach the battery holder to the breadboard by soldering some male headers onto its positive and negative wiring leads.
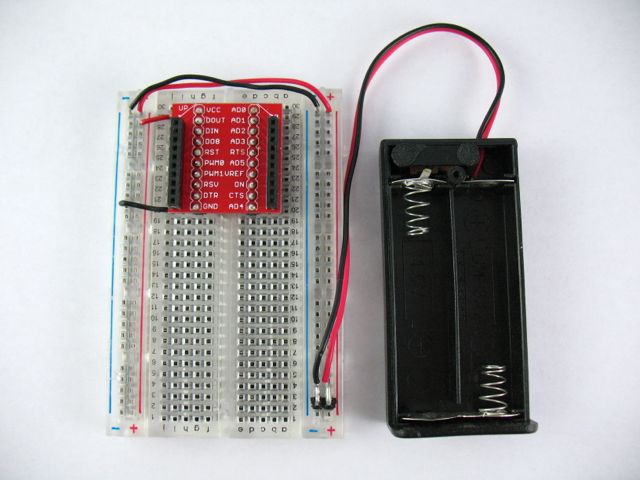
- Connect the battery pack directly to the ground and power rails.
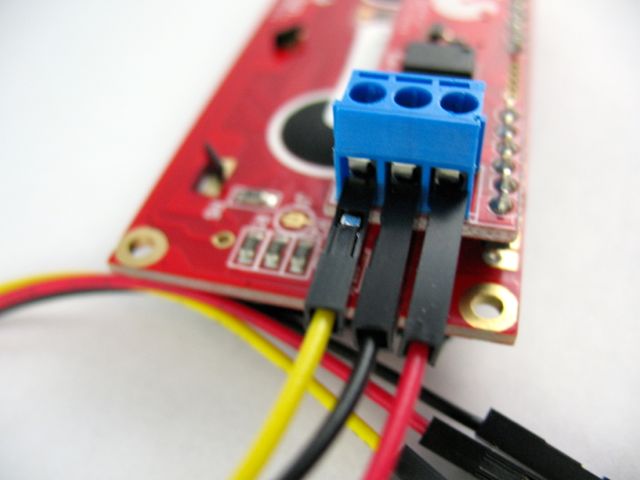
- Because the LCD is using a serial backpack, it will need to be connected by just three wires for power, ground and receive. We inserted them into the terminal block and used the screws on top to tighten the connection. (This particular backpack was marked "5V" on the terminal block but the documentation assured us that it was really 3.3V.)
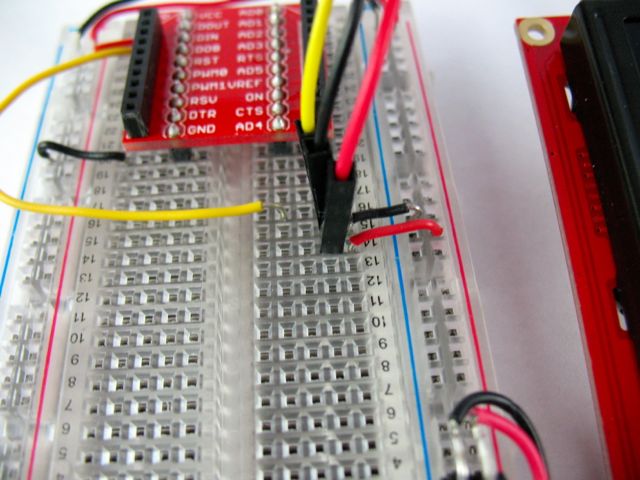
- Connect the LCD's power wire and ground wire to the respective rails on the breadboard as shown. Two AA batteries will provide 3V, which is close enough to the 3.3V rating of the LCD to power it effectively. The receive or RX connection will be routed to the TX or DOUT pin of the XBee.
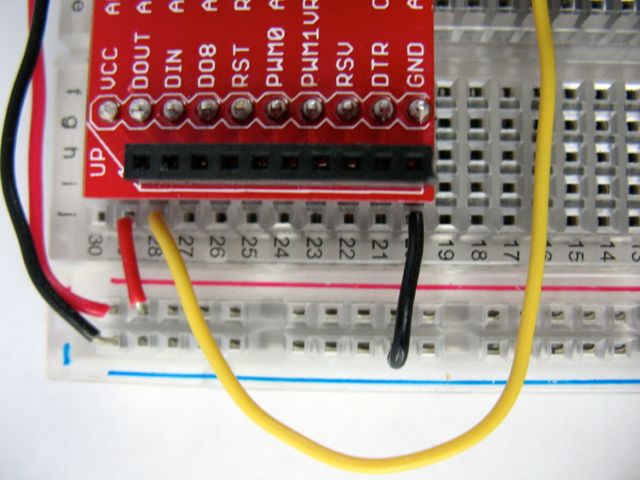
- The receive or RX for the LCD should be connected to the TX or DOUT pin of the XBee, physical pin 2 as shown. That way whatever the XBee transmits will be received by the serial backpack on the LCD.
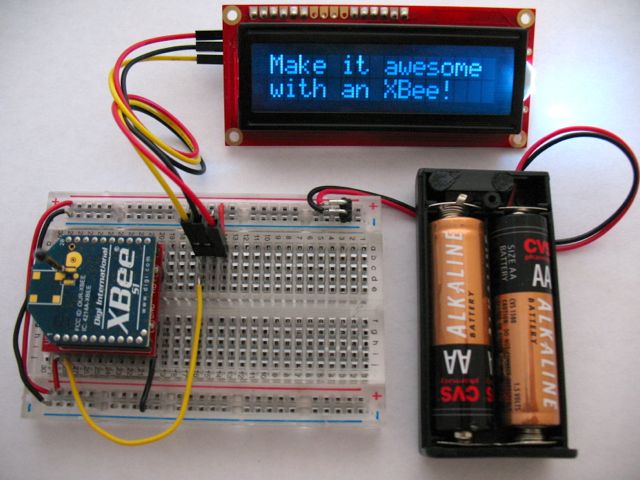
- And finally, insert the Digi XBee into the breakout board and connect the battery pack. If there's a switch on the battery pack be sure to switch it to the on position. You should see the LCD's backlight come on. Now any text sent to the Digi XBee should show up on the LCD! See the Basic Chat example for more information on sending text.
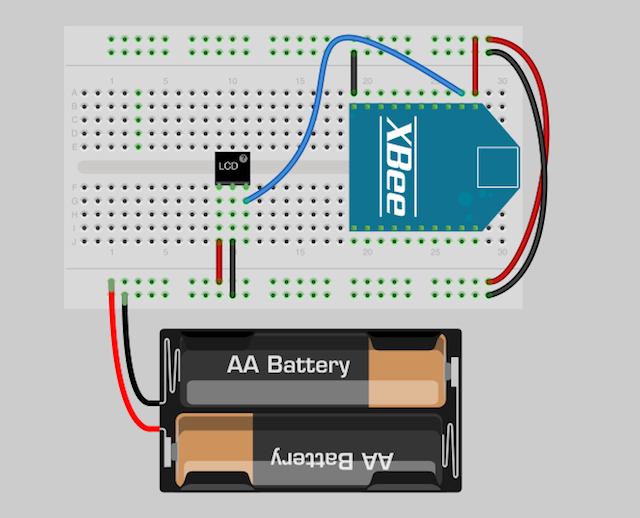
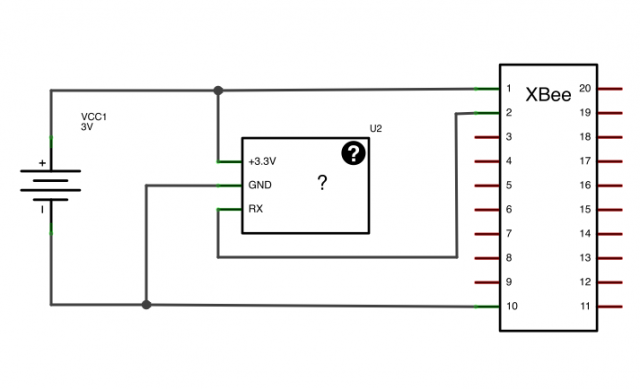
- Above is a breadboard layout and a diagram of the circuit for your reference.
5) Use it!
Now that you know how to connect an LCD to the serial output of a Digi XBee radio, take a look at our chat example for an easy way to send text from your computer.
For plain text, just send the text itself. Whatever you type will be displayed on the LCD screen. To control the LCD output you can send control codes as well. For example, from CoolTerm use Send String in hex mode. FF 01 will clear the display. Reference the serial backpack data sheet to see all the control codes. Use the same methods to send output via Serial.print() from a microcontroller like the Arduino; just be sure that the the transmitter's destination address is set to the MY address of the receiver. Want to see some real power? Push your text from any server or device on the Internet using the Digi XBee Internet Gateway's remote text sending feature. The video above shows both CoolTerm on a local computer and iDigi POSTing from the Internet.
Create a Twitter display for your office door, prototype a quiz game toy that teaches math or add interactive instructions to your automated greenhouse watering system. This LCD is a great way to make the things you make talk to people!