Introduction
This document is Part 5 of the DMVPN (Dynamic Multipoint VPN) Knowledge Base series.
It explains how to configure a Digi TX40 router as a DMVPN spoke (Remote Site 4), using IPsec, mGRE, NHRP, and BGP.
Prerequisites
The Digi Router (in this depolyment we will use a Digi TX40) has been configured with a WAN and LAN address basing on the following Network Addressing:
.jpg?lang=en-US)
All configuration steps are performed via the Web UI under: System → Configuration
1. IPsec Configuration
Navigate to VPN → IPsec → Tunnels → Add and add a new tunnel:
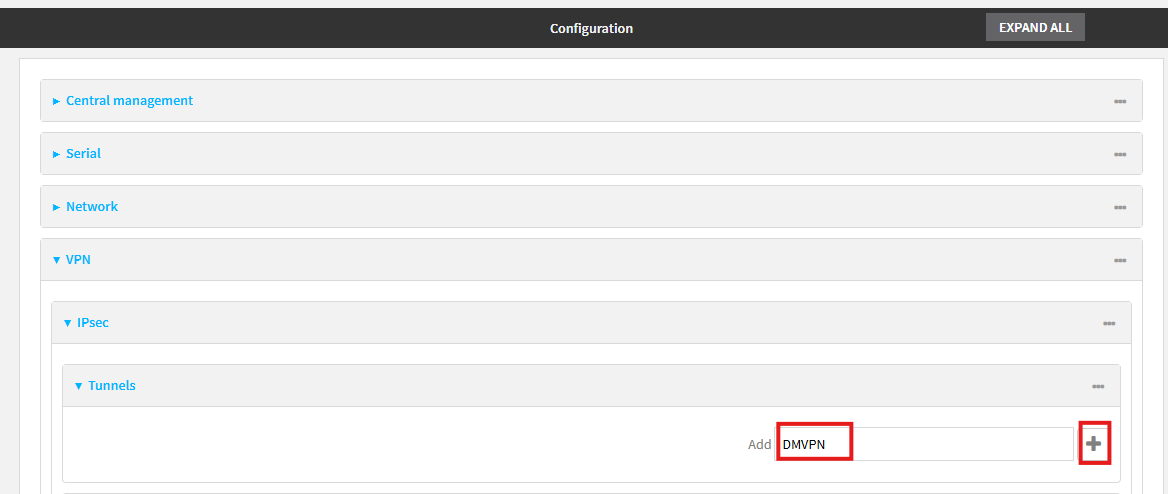
This IPsec tunnel is responsible for securing all GRE/mGRE traffic that forms the DMVPN overlay network.
The following screenshots and configuration notes illustrate the required IPsec tunnel settings.
1.1 General Settings:
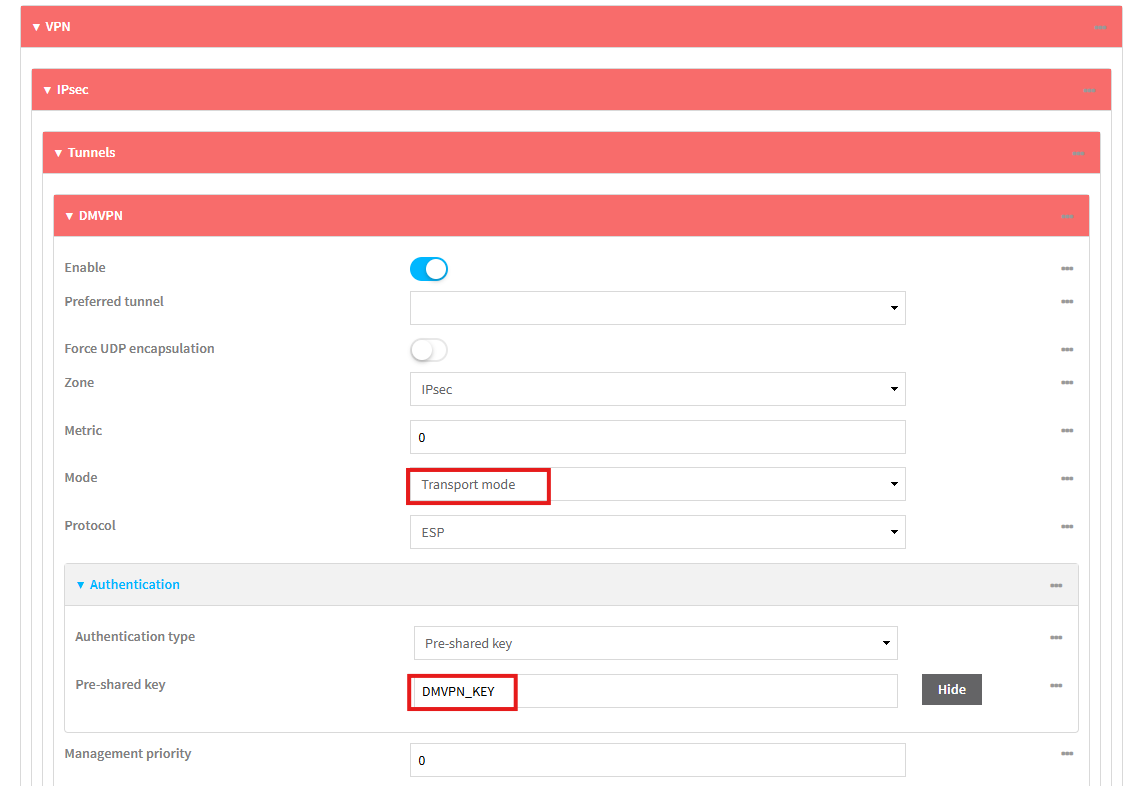
- Mode: Transport
- Authentication: PSK → DMVPN_KEY (example only)
1.2 Endpoints
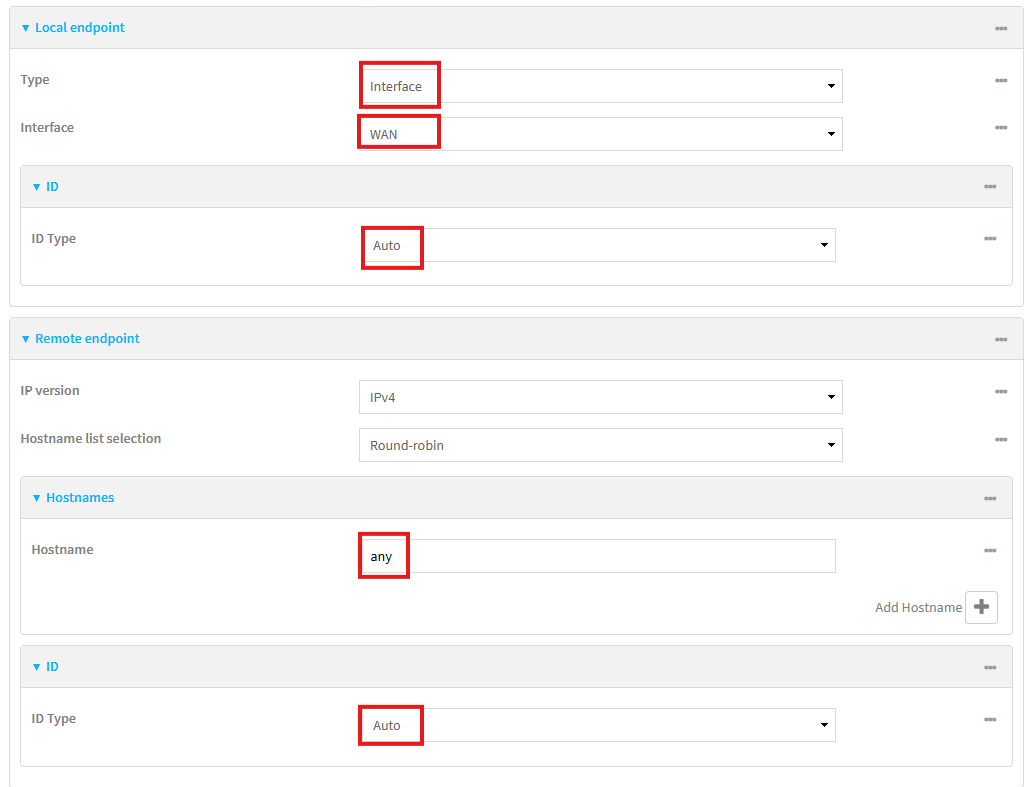
- Local Endpoint:
- Local Interface: wan
- Local ID: Auto
- Remote Endpoint
- Remote hostname: any (as this will be dynamic spoke operation, so currently unknown)
- Remote ID: Auto
1.3 Policy Settings
In the Policies section, Add a policy and configure as follows:
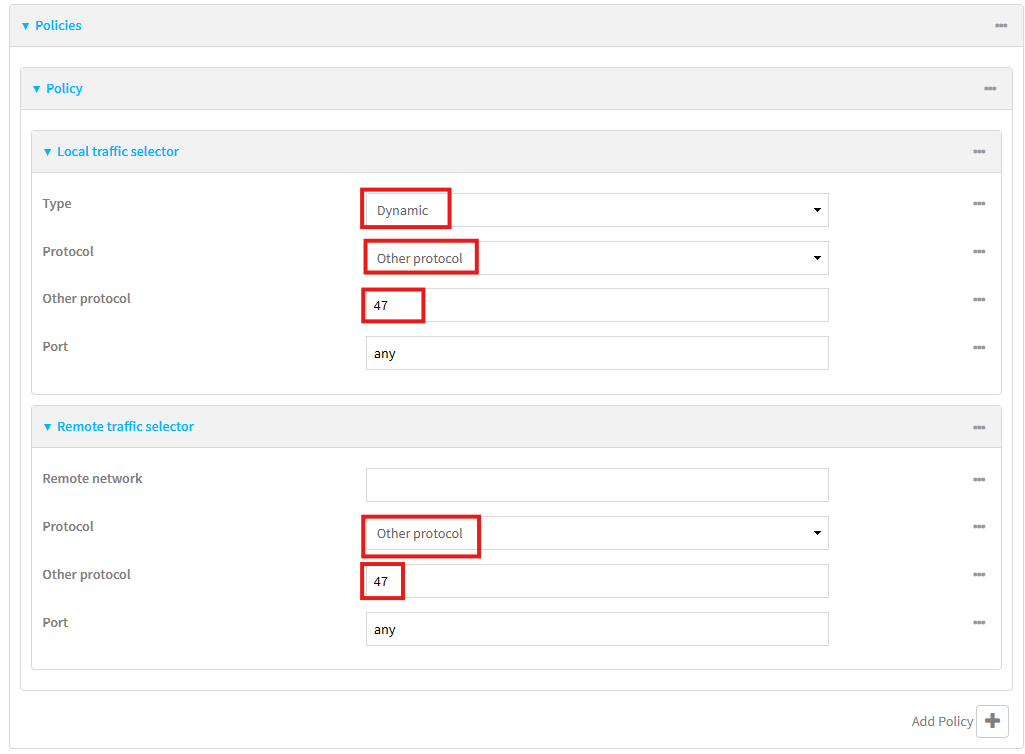
Local Traffic Selectors
- Type: Dynamic
- Protocol: Other (47) – GRE
- Port: Any
Remote Traffic Selector
- Remote Network: Empty
- Protocol: Other (47) - GRE
- Port: Any
1.4 Phase 1 & Phase 2 Proposals
Configure IKEv2, Phase 1, and Phase 2 to match the Cisco hub settings (see previous KB: ) as follows:
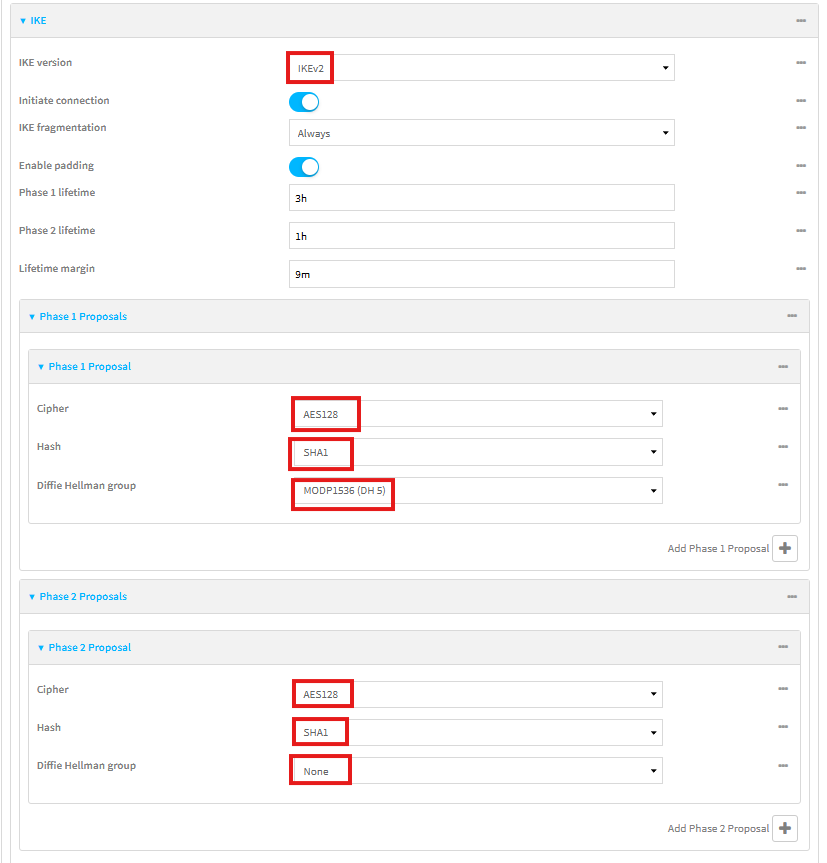
1.5 Additional Settings
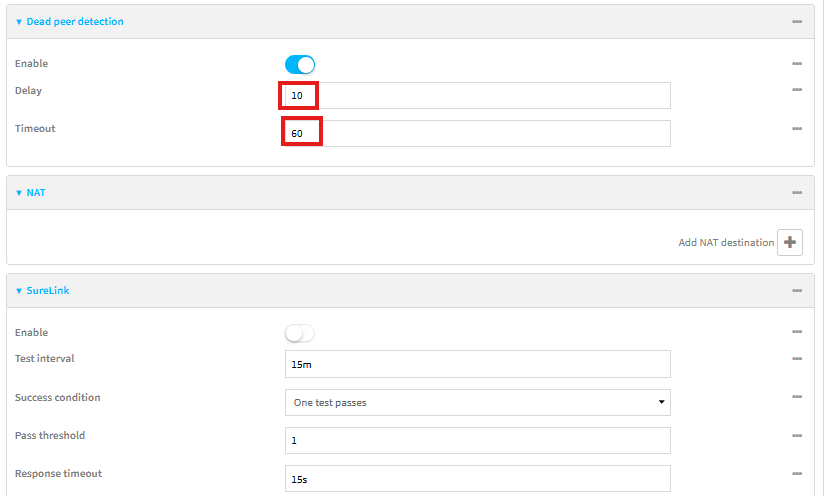
- DPD Settings: Adjust Dead Peer Detection:
- Delay: 10 s
- Timeout: 60 s
- NAT: Disabled
- SureLink: Disabled
2. GRE / mGRE Tunnel
Navigate to VPN → IP Tunnels, create a tunnel named mGRE and configure as below:
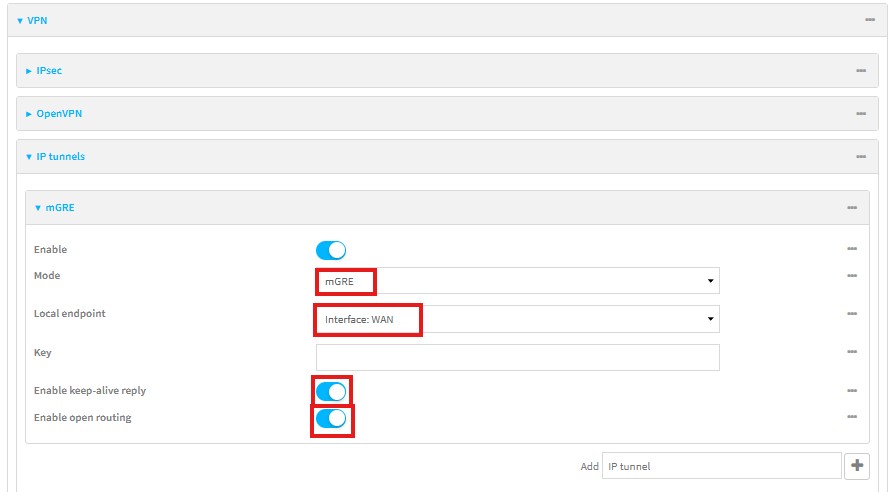
- Mode: mGRE
- Local endpoint: WAN
- Keepalive: Enabled
- Open Routing: Enabled
- GRE key: Not used
3. Tunnel Interface Configuration
Navigate to Network → Interfaces, then create an interface named Tunnel0, configured as below:
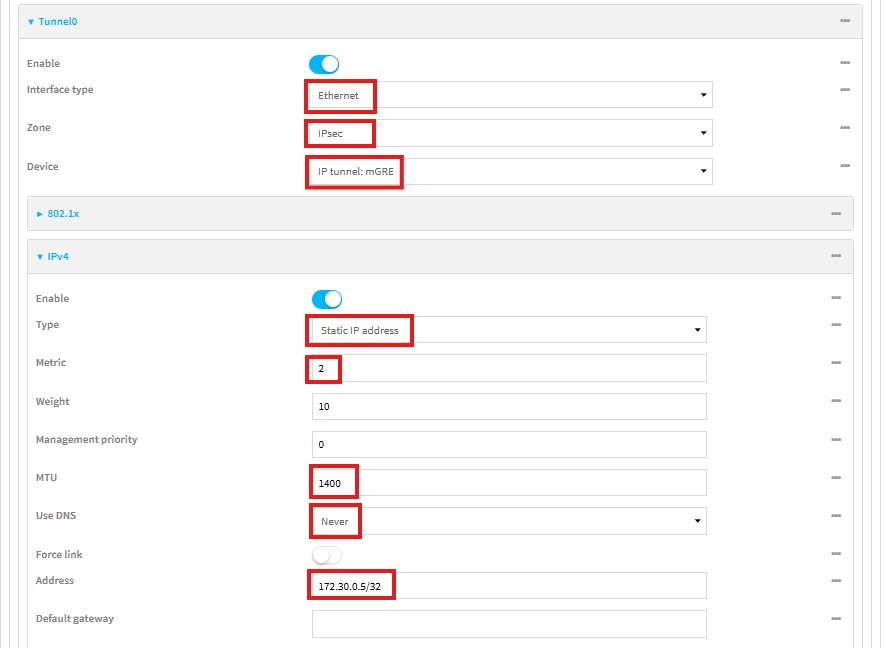
- Type: Ethernet
- Zone: IPsec
- Device: mGRE
- IPv4: Static
- Address: 172.30.0.5/32
- Metric: 2
- MTU: 1400
- DNS: Never
- Gateway: Blank
Click Apply.
4. Routing
4.1 Static Route
Navigate to Network → Routes → Static Routes and add a static route as below:
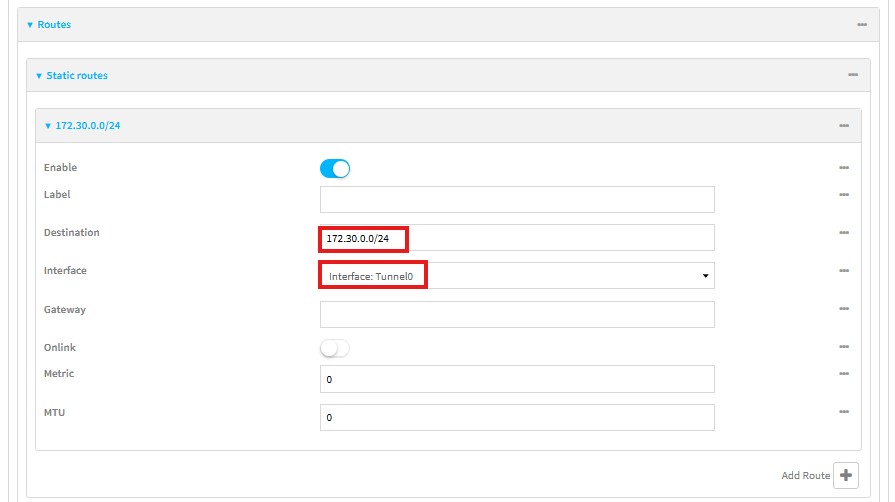
- Destination: Tunnel0
- Gateway: None (dynamic NHRP will handle resolution)
4.2 NHRP Configuration
Navigate to Network → Routes → Routing Services.
Enable NHRP and configure as below:

General Settings
Interface Entry
- Interface: Tunnel0
- Tunnel: mGRE
- IPsec protection: DMVPN IPsec tunnel
- Network ID: 1 (must match all routers)
Next Hop Server
- NBMA address: 81.68.87.1 (Cisco hub WAN)
- Overlay address: 172.30.0.1 (Cisco hub GRE IP)
Node Map
- Same values as above
- Enable: Unique + Shortcut
Click Apply.
4.3 BGP Configuration
Navigate to Network → Routes → Routing Services → BGP and configure as below.
General Settings
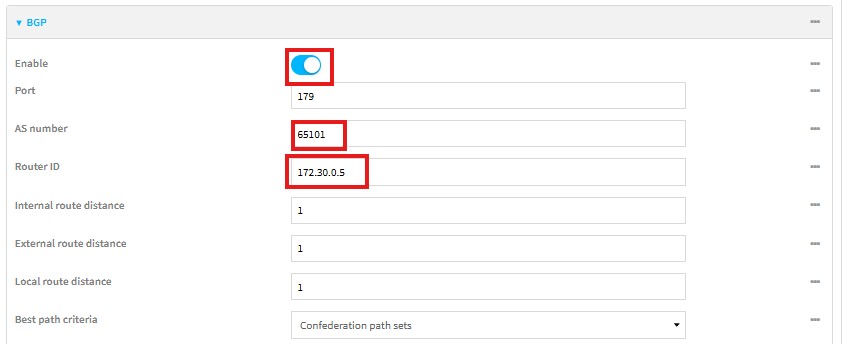
- Enable: Yes
- AS number: 65101
- Router ID: 172.30.0.5
Neighbours
Add a neighbor:
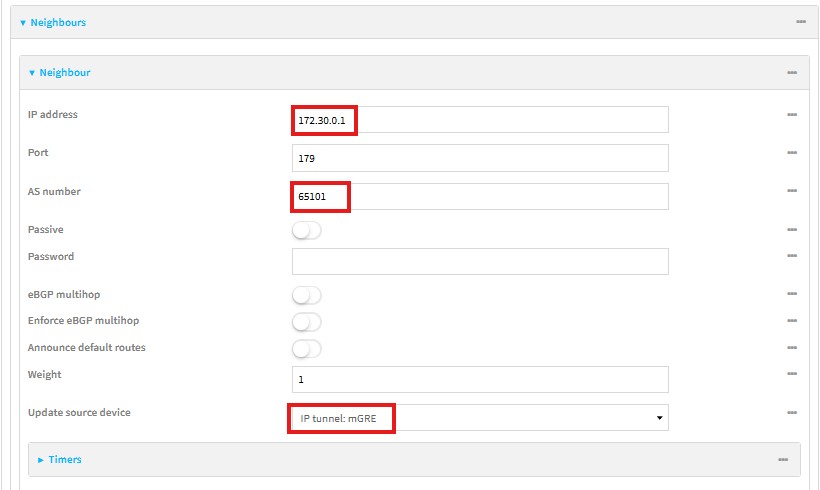
- Address: 172.30.0.1
- Remote AS: 65101
- Update source: mGRE tunnel
Advertised Networks
Add the LAN network of the Digi router:

Click Apply.
5. Firewall Configuration
Navigate to Firewall → Packet Filtering.
The final configuration task is to set up the firewall to allow traffic between the necessary zones and IP subnets. The router will already contain some default rules, which may vary depending on the device and firmware version.
For this DMVPN implementation, the following rules must be added:
- Allow traffic from IPsec to Internal zone, configured as follows:
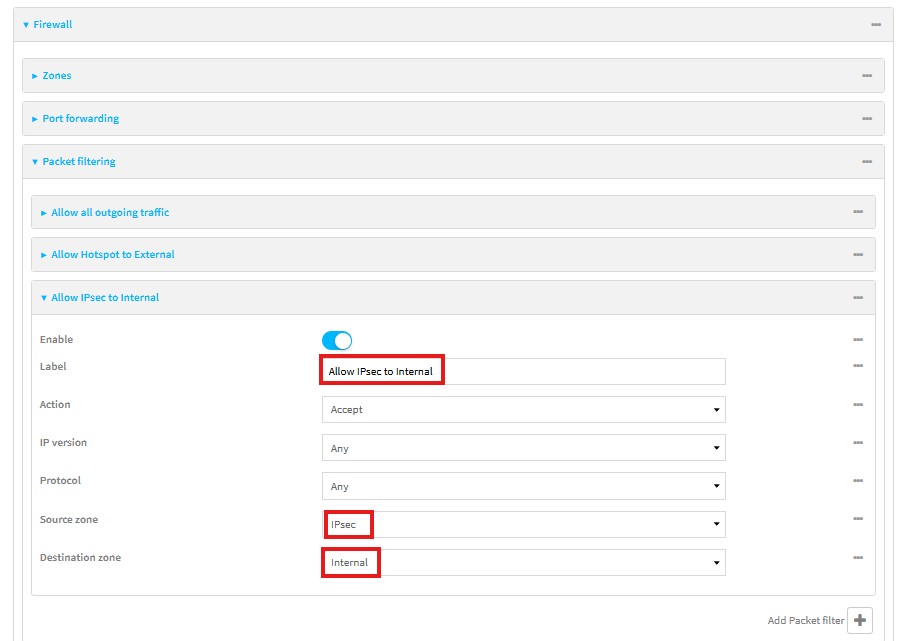
- Action: Accept
- IP Version: Any
- Protocol: Any
- Source Zone: IPsec
- Destination Zone: Internal
- Allow traffic from the local LAN network, configured as follows:
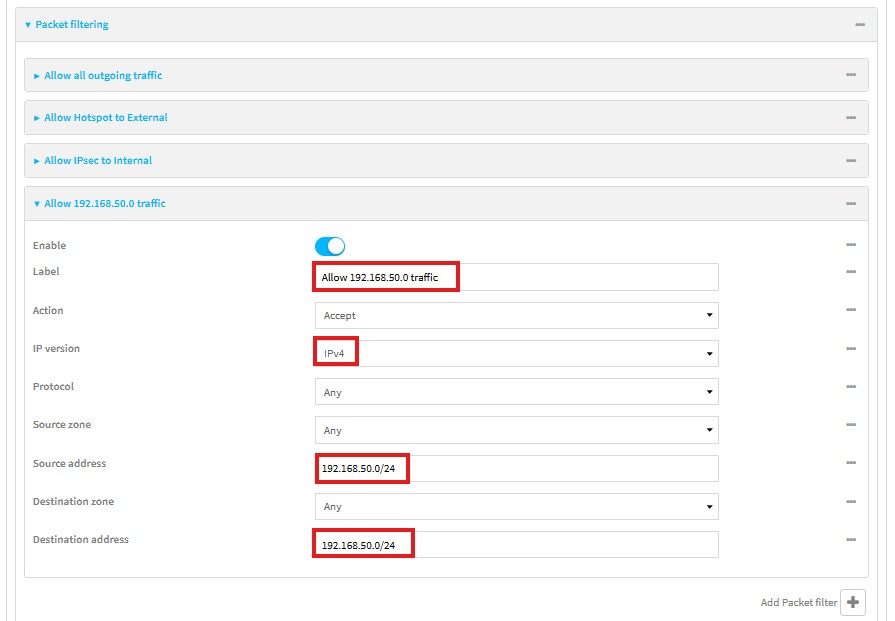
- IP Version: IPv4
- Source Address:
192.168.50.0/24
- Destination Address:
192.168.50.0/24
- Zones: Not required for this specific rule, as it is based on IP addressing rather than Zones
Click Apply.
This completes the Digi router setup.
Further Information
Related Video: [link]
Introduction and KB/Video Index: [link to KB - 0 that contains all video/kb list and links]
Last updated:
Mar 04, 2026