Introduction
Digi Accelerated Linux (DAL) devices provide access to an underlying Linux console, referred to as "shell mode."
This article covers enabling Interactive shell access for a specific authentication group (e.g. admin), so that members of that group can reach the Linux console via SSH, the local Web interface terminal, or Digi Remote Manager Terminal.
Prerequisites
- Administrative access to the device's Web interface (also achievable via SSH or Digi Remote Manager), to enable shell mode
- A user account belonging to an authentication group (e.g. admin) with Interactive shell access enabled
- For Digi Remote Manager access: the device must be registered and connected to DRM, with an active Premier, Digi360, or LifeCycle Assurance subscription assigned.
Question/Issue
How do I access the Linux console on a Digi Accelerated Linux (DAL) device?
Solution
Step 1: Enable shell mode
Shell mode is disabled by default and must be turned on before any of the access methods below will work.
- In the Web interface, go to Device Management > Device Configuration.
- Expand Groups > admin and configure:
- Admin access: Enabled, with Access level set to Full access
- Interactive shell access: Enabled
- Click Apply to save the configuration
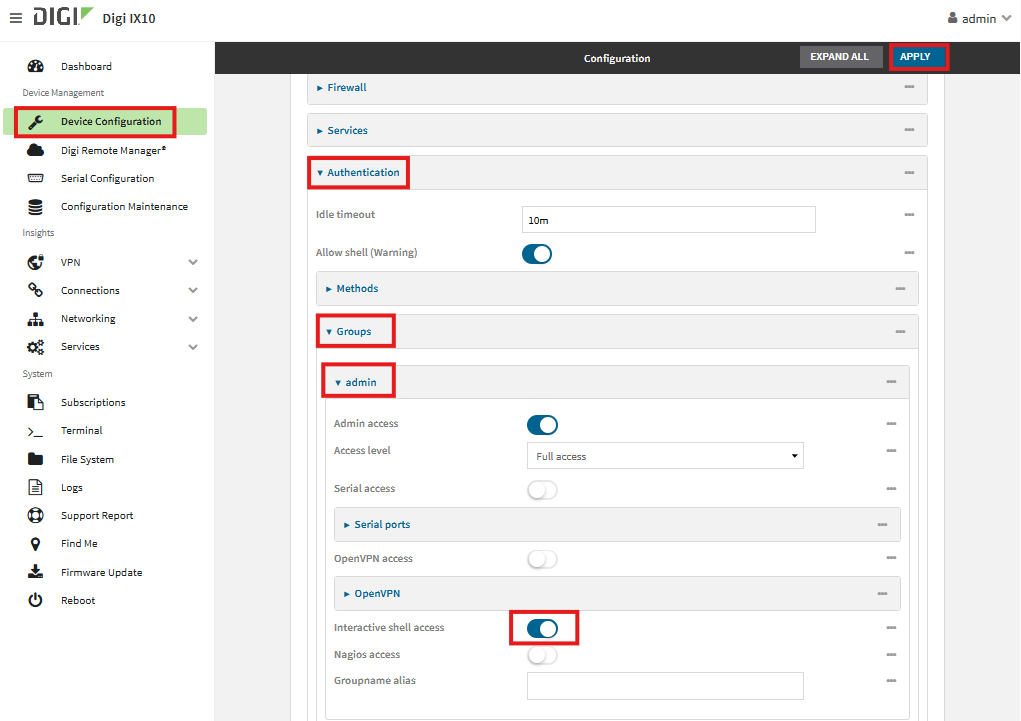
Once applied, any user account belonging to the admin group can be used to reach shell mode via SSH or the local Web interface terminal.
Step 2: Access the Linux console
Option A — SSH session
- Open an SSH session to the device's IP address, using an SSH client
- Log in with a user account belonging to the admin group.
- At the Access selection menu, select s for Shell. Once connected to the shell, standard Linux commands can be entered directly at the prompt:
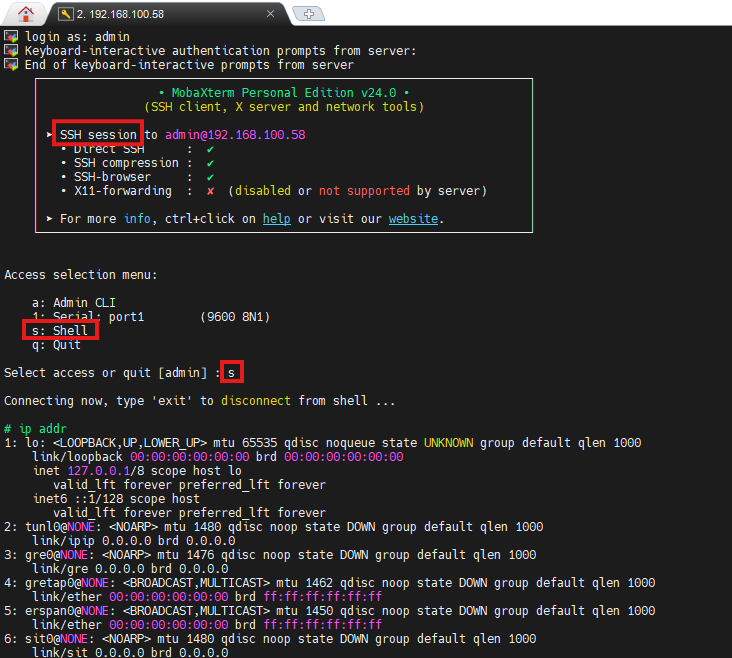
Option B — Local Web interface Terminal
1. In the device's local Web interface, go to System > Terminal:
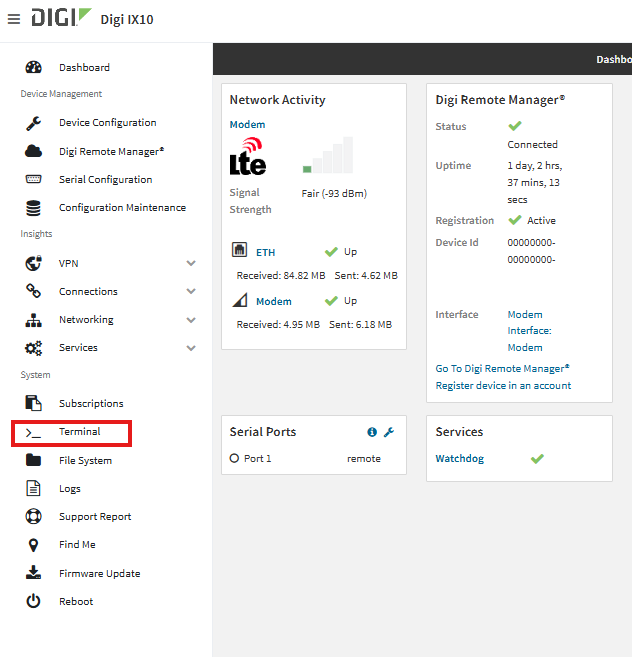
2. Log in with a user account belonging to the admin group.
3. At the Access selection menu, select s for Shell. Once connected to the shell, standard Linux commands can be entered directly at the prompt:
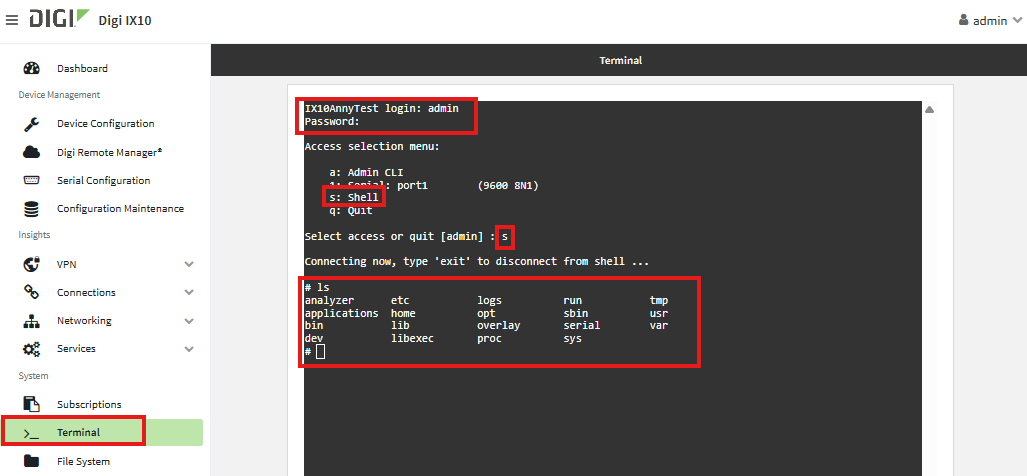
Option C — Digi Remote Manager (DRM) Terminal
1. In Digi Remote Manager, go to Device Management > Devices and select the device.
2. Open the Terminal tab:
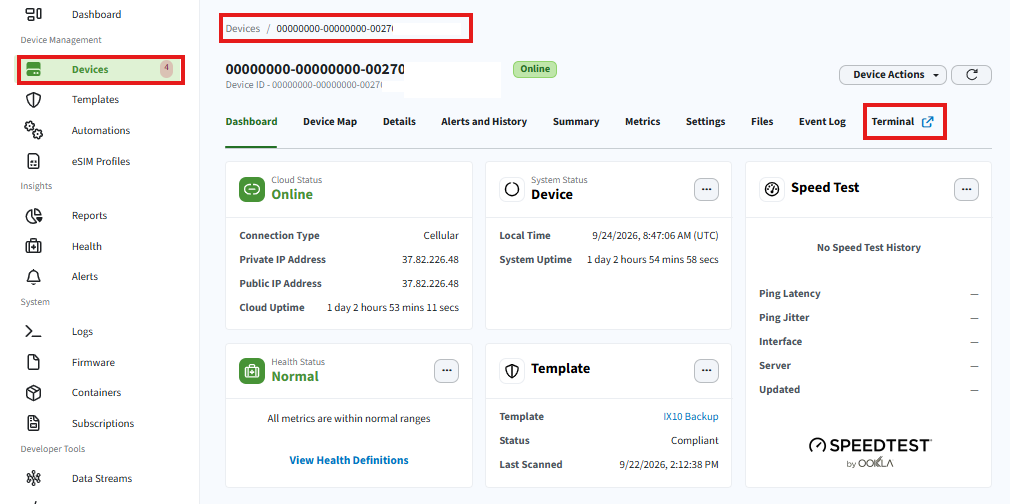
3. At the Access selection menu, select s for Shell. Once connected to the shell, standard Linux commands can be entered directly at the prompt:
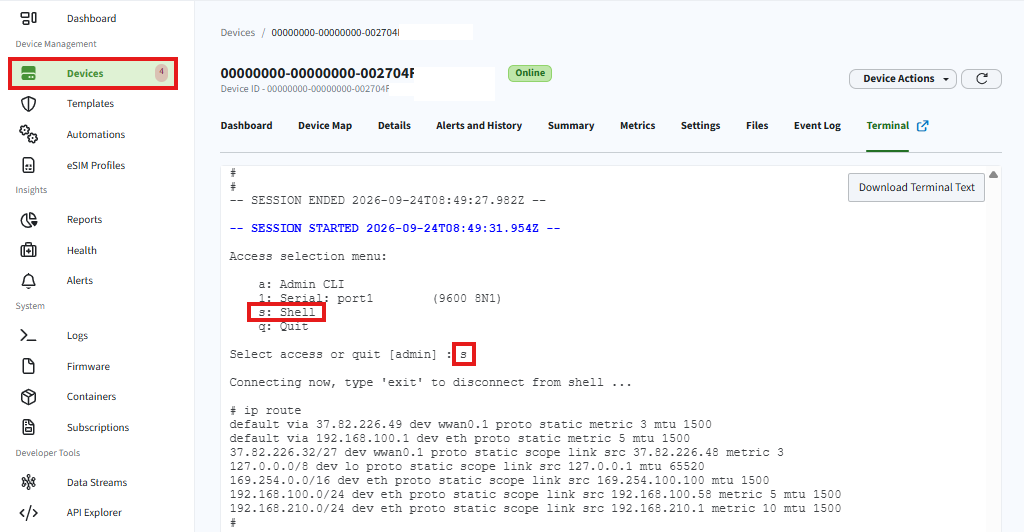
Note: No login is required for the DRM Terminal session, since it is already securely connected to the device but requires an active Premier, Digi360, or LifeCycle Assurance subscription on the device. Without one of these subscriptions, the Terminal tab is not available in Digi Remote Manager.
Note: Disabling shell access
Shell access can be turned off globally, for all authentication groups, by disabling Allow shell (Warning) under Authentication:
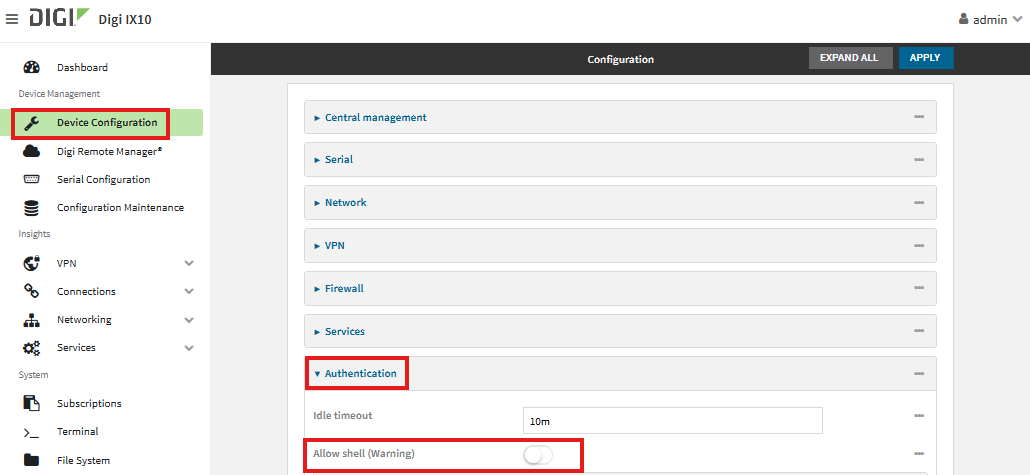
Disabling this option:
- Prohibits shell access for all authentication groups
- Prevents shell use in all custom scripts
- Locks down custom firewall rules to a small, restricted set of iptables and related commands
Once Allow shell is disabled, the per-group Interactive shell access setting is no longer visible or configurable.
⚠️ Warning: If shell access is disabled and later re-enabled, the device's configuration will be erased and the device will reboot. This should be carefully considered before disabling Allow shell on a production device.
Separately, note that any authentication group with Interactive shell access enabled has full administrative access to the device — this permission should be granted only to trusted, administrative-level users.
For additional background, see the Digi user guide:
Disabling shell access
Last updated:
Sep 24, 2026